How to Install Bathroom Sink Taps: A Step-by-Step DIY Guide
When it comes to refreshing your bathroom, knowing how to install bathroom sink taps can save you money and give your space a new look instantly. Whether you’re upgrading to a sleek modern mixer tap or replacing old, worn-out taps, this step-by-step guide will walk you through the process. Along the way, we’ll also highlight product specifications you should look for and how to ensure your new taps provide both style and functionality.
Why Replacing Bathroom Sink Taps Matters
Bathroom taps are not just practical fixtures, they’re design elements that influence the overall look of your bathroom. Over time, taps can corrode, leak, or lose their shine. Installing new ones ensures smooth water flow, improved efficiency, and enhanced aesthetics.
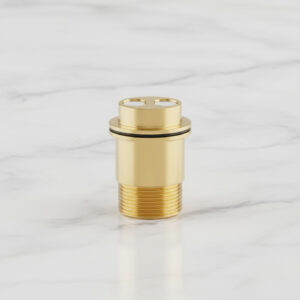
Product Specifications to Consider
Before starting the installation, it’s important to understand the product specifications of your chosen taps:
- Material: Look for taps made of solid brass with a chrome or stainless-steel finish for durability and resistance to corrosion.
- Design: Single-lever mixer taps are modern and user-friendly, while traditional two-handle taps provide a classic look.
- Water Pressure Compatibility: Always check the tap’s specification to see if it is suitable for high- or low-pressure water systems.
- Size & Fit: Measure the sink’s tap holes (usually 1 or 3 holes) to match with the correct tap type.
- Warranty & Certification: Choose taps with manufacturer warranty and WRAS (Water Regulations Advisory Scheme) approval if available.
Tools and Materials You’ll Need
- Adjustable spanner
- Basin wrench
- Plumber’s tape (PTFE tape)
- Bucket or towel
- Silicone sealant (optional)
- New bathroom sink taps
Step-by-Step Guide to Installing Bathroom Sink Taps
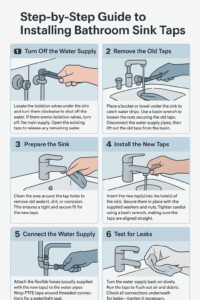
Step 1: Turn Off the Water Supply
Locate the isolation valves under the sink and turn them clockwise to shut off the water. If there are no isolation valves, turn off the main supply. Open the existing taps to release any remaining water.
Step 2: Remove the Old Taps
Place a bucket or towel under the sink to catch water drips. Use a basin wrench to loosen the nuts securing the old taps. Disconnect the water supply pipes, then lift out the old taps from the basin.
Step 3: Prepare the Sink
Clean the area around the tap holes to remove old sealant, dirt, or corrosion. This ensures a tight and secure fit for the new taps.
Step 4: Install the New Taps
Insert the new tap(s) into the hole(s) of the sink. Secure them in place with the supplied washers and nuts. Tighten carefully using a basin wrench, making sure the taps are aligned straight.
Step 5: Connect the Water Supply
Attach the flexible hoses (usually supplied with the new taps) to the water pipes. Wrap PTFE tape around threaded connections for a watertight seal. Double-check that hot and cold supplies are connected to the correct inlets.
Step 6: Test for Leaks
Turn the water supply back on slowly. Run the taps to flush out air and debris. Check all connections underneath for leaks—tighten if necessary.
Step 7: Finishing Touches
Apply a small bead of silicone sealant around the base of the taps if recommended. Finally, wipe down the taps to remove fingerprints and debris.
Product Use and Benefits
Installing high-quality bathroom sink taps has several benefits:
- Improved Efficiency: Modern taps are designed to reduce water wastage with aerators and flow restrictors.
- Enhanced Hygiene: Single-lever taps make it easier to control temperature and flow with one hand.
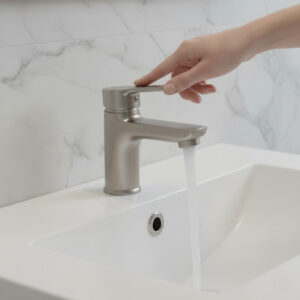
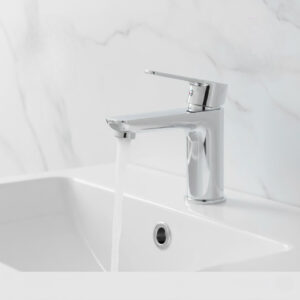
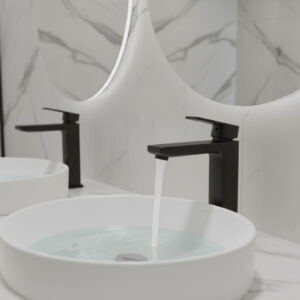
- Aesthetic Appeal: Sleek finishes like chrome or matte black instantly update your bathroom’s look.
- Long-Term Durability: Brass-bodied taps with ceramic disc cartridges last longer and reduce dripping.
Final Thoughts
Learning how to install bathroom sink taps is a rewarding DIY project that enhances both the function and style of your bathroom. With the right tools, a clear step-by-step approach, and careful product selection, you can achieve a professional-looking finish.
If you’d prefer expert assistance, professional services like Benner Plumbing & Heating Ltd. can provide high-quality tap installations and bathroom upgrades, ensuring your project is handled with precision and care.