How to Fix Flush Valve: A Step-by-Step Toilet Repair Guide
How to fix flush valve problems is one of the most common questions homeowners face when dealing with toilet issues. A malfunctioning toilet can be a real inconvenience, and often the culprit is the flush valve. The good news is that repairing or replacing a faulty flush valve isn’t as complicated as it may seem. With the right tools, materials, and guidance, you can restore your toilet to working order without always needing to call a plumber.
In this step-by-step guide, we’ll walk you through the basics of fixing a flush valve, explain what it does, and give you tips to keep your toilet running smoothly.
What Is a Flush Valve?
Before learning how to fix a flush valve, it’s important to understand what it is. The flush valve is located inside the toilet tank and is responsible for releasing water from the tank into the bowl when you flush. It usually consists of a vertical overflow tube, a flapper or seal, and the valve seat. Over time, wear and tear can cause leaks, weak flushes, or toilets that won’t stop running.
Common Signs Your Flush Valve Needs Repair
Not sure if the flush valve is the problem? Here are some common symptoms:
- Toilet runs continuously even after flushing
- Weak or incomplete flushes
- Water leaking into the bowl from the tank
- Frequent need to jiggle the handle to stop water flow
If you’re experiencing any of these issues, it’s a strong indication that the flush valve needs fixing or replacement.
Tools and Materials You’ll Need
To fix a flush valve, gather the following tools:
- Adjustable wrench
- Screwdriver
- Sponge or towel
- Replacement flush valve kit (if needed)
- Bucket
Step-by-Step Guide: How to Fix a Flush Valve
1. Turn Off the Water Supply
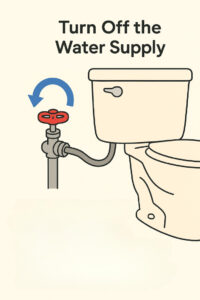
Locate the shut-off valve behind your toilet and turn it clockwise to stop water from flowing into the tank. Flush the toilet to drain most of the water. Use a sponge or towel to remove any remaining water from the tank.
2. Remove the Tank Lid
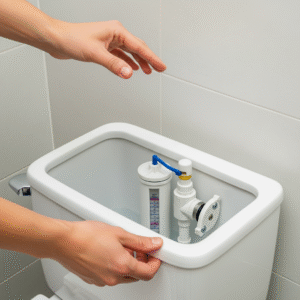
Carefully lift the lid off the tank and set it aside somewhere safe.
3. Inspect the Flush Valve
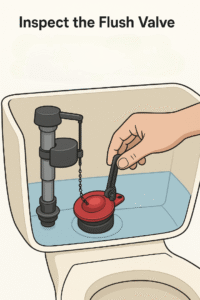
Check the flapper or seal for cracks, mineral buildup, or warping. If it looks worn, replacing the flapper alone may solve the problem.
4. Disconnect the Tank (if needed)
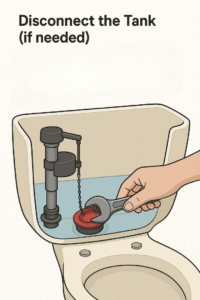
In some cases, you may need to remove the tank from the bowl to access and replace the flush valve. Use a wrench to loosen the nuts that secure the tank to the toilet bowl.
5. Replace the Flush Valve
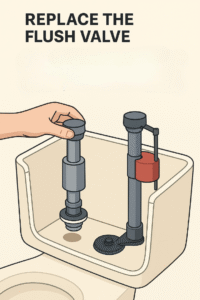
Remove the old flush valve assembly and install the new one according to the manufacturer’s instructions. Ensure the seal is properly aligned to prevent leaks.
6. Reattach the Tank
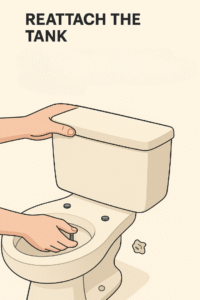
Carefully place the tank back onto the bowl and secure it with the mounting bolts. Do not overtighten, as this can crack the porcelain.
7. Reconnect the Water Supply
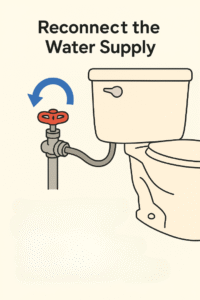
Turn the shut-off valve counterclockwise to restore water flow. Allow the tank to fill, then test the flush to ensure everything is working correctly.
Preventing Future Flush Valve Problems
To keep your toilet in good shape:
- Clean the tank periodically to prevent mineral buildup.
- Replace worn flappers before they cause leaks.
- Avoid using harsh chemical cleaners inside the tank, as they can damage rubber parts.
Final Thoughts
Learning how to fix flush valve problems can save you both time and money. With a little patience and the right tools, you can handle this common toilet repair yourself and extend the life of your bathroom fixtures. However, if you’d rather leave it to the experts, Benner Plumbing & Heating Ltd. is here to help. Their trusted plumbing professionals can quickly diagnose and fix any toilet issues, ensuring your bathroom runs smoothly again.